Connect webhook
- You can register webhook to receive notifications about particular events in a shop.
- Note:
- Notification contains a JSON payload.
- Only support HTTPS.
TABLE OF CONTENTS
- Step 1: Create app
- Step 2: Use ngrok to register webhook
- Step 3: Register webhook
- Step 4: Call api subscribe webhook
- Step 5: Receive notifications from webhook
- Step 6: Authenticate webhook
- Step 7: Call api unsubscribe webhook
- Step 8: Call api get subscribed webhook
- Step 9: Note
Step 1: Create app
- Follow the link https://partners.haravan.com/apps (If you haven’t logged in, the system will redirect to sign in https://accounts.haravan.com, and at this page you can sign in or sign up).
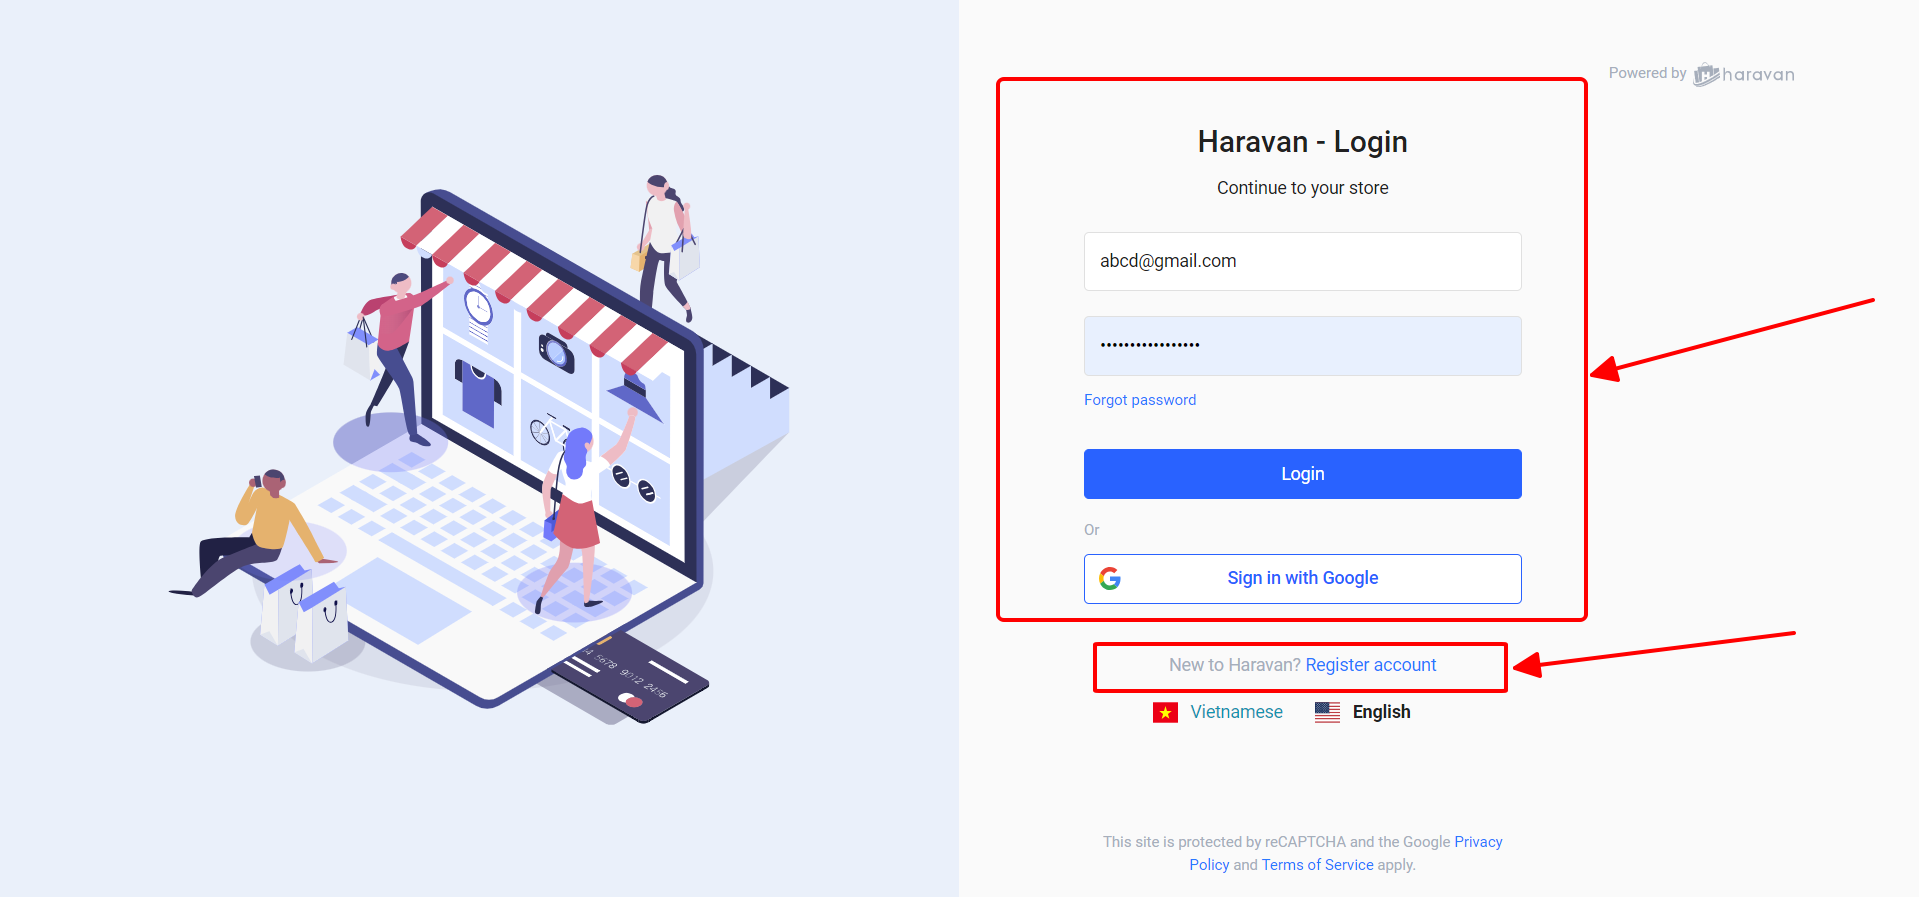
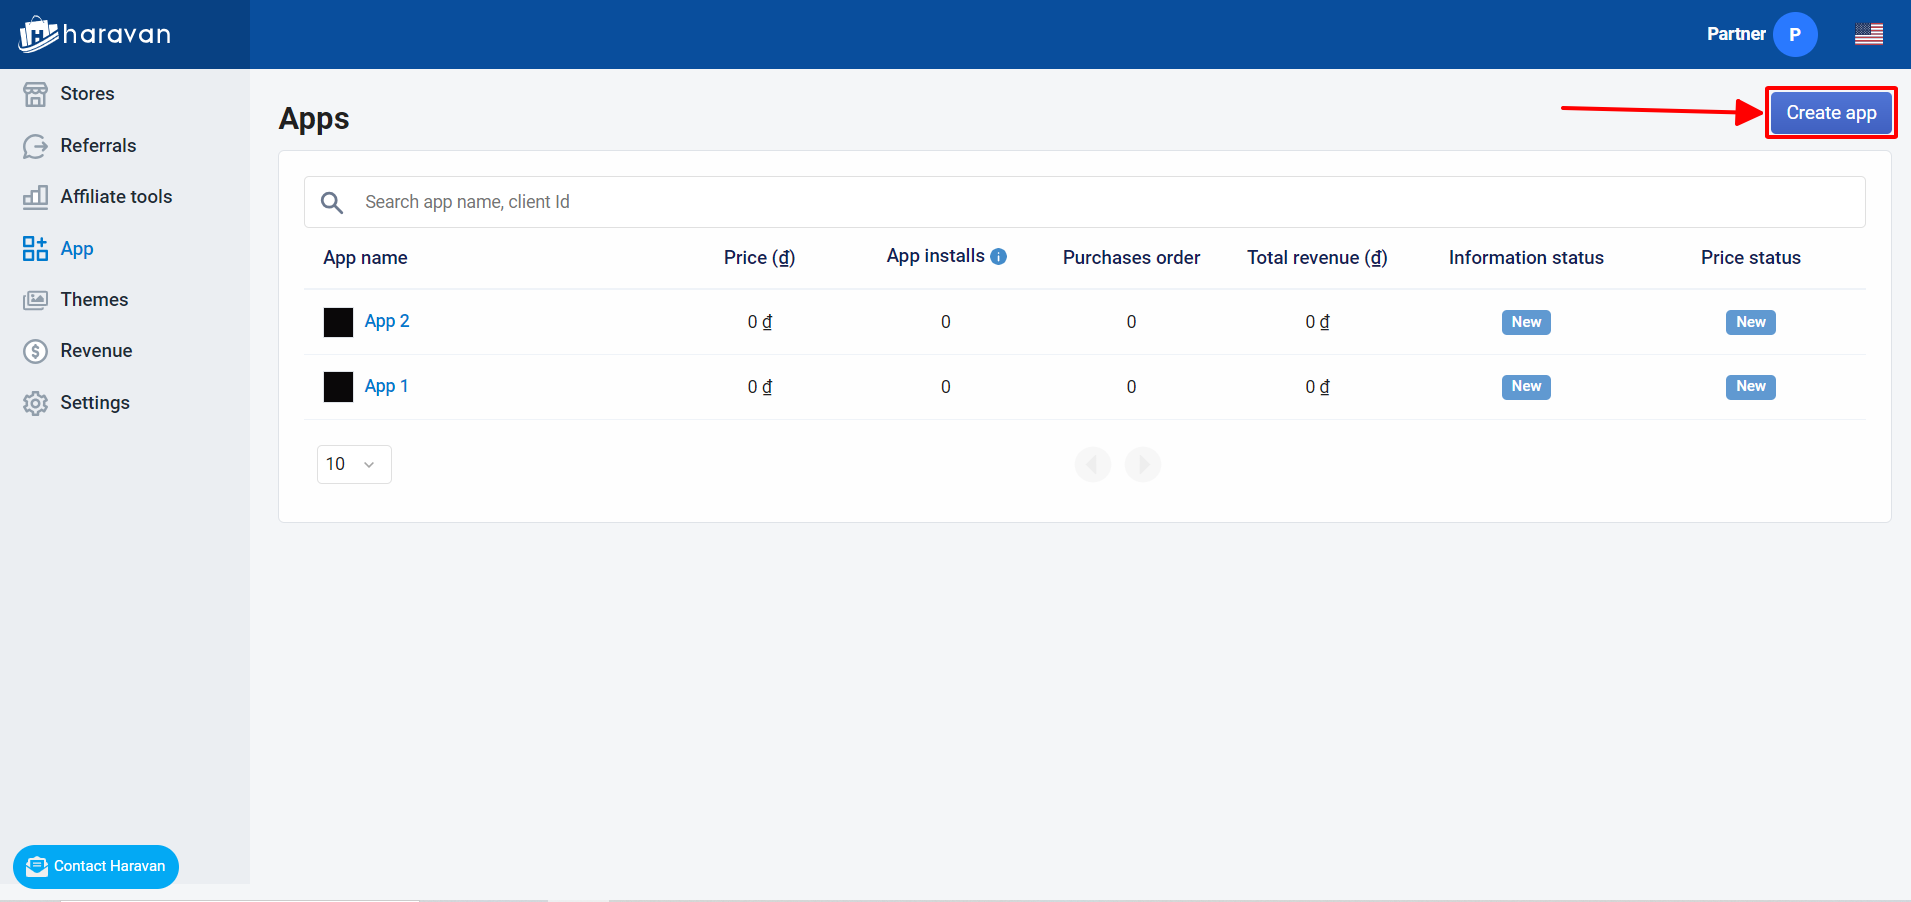
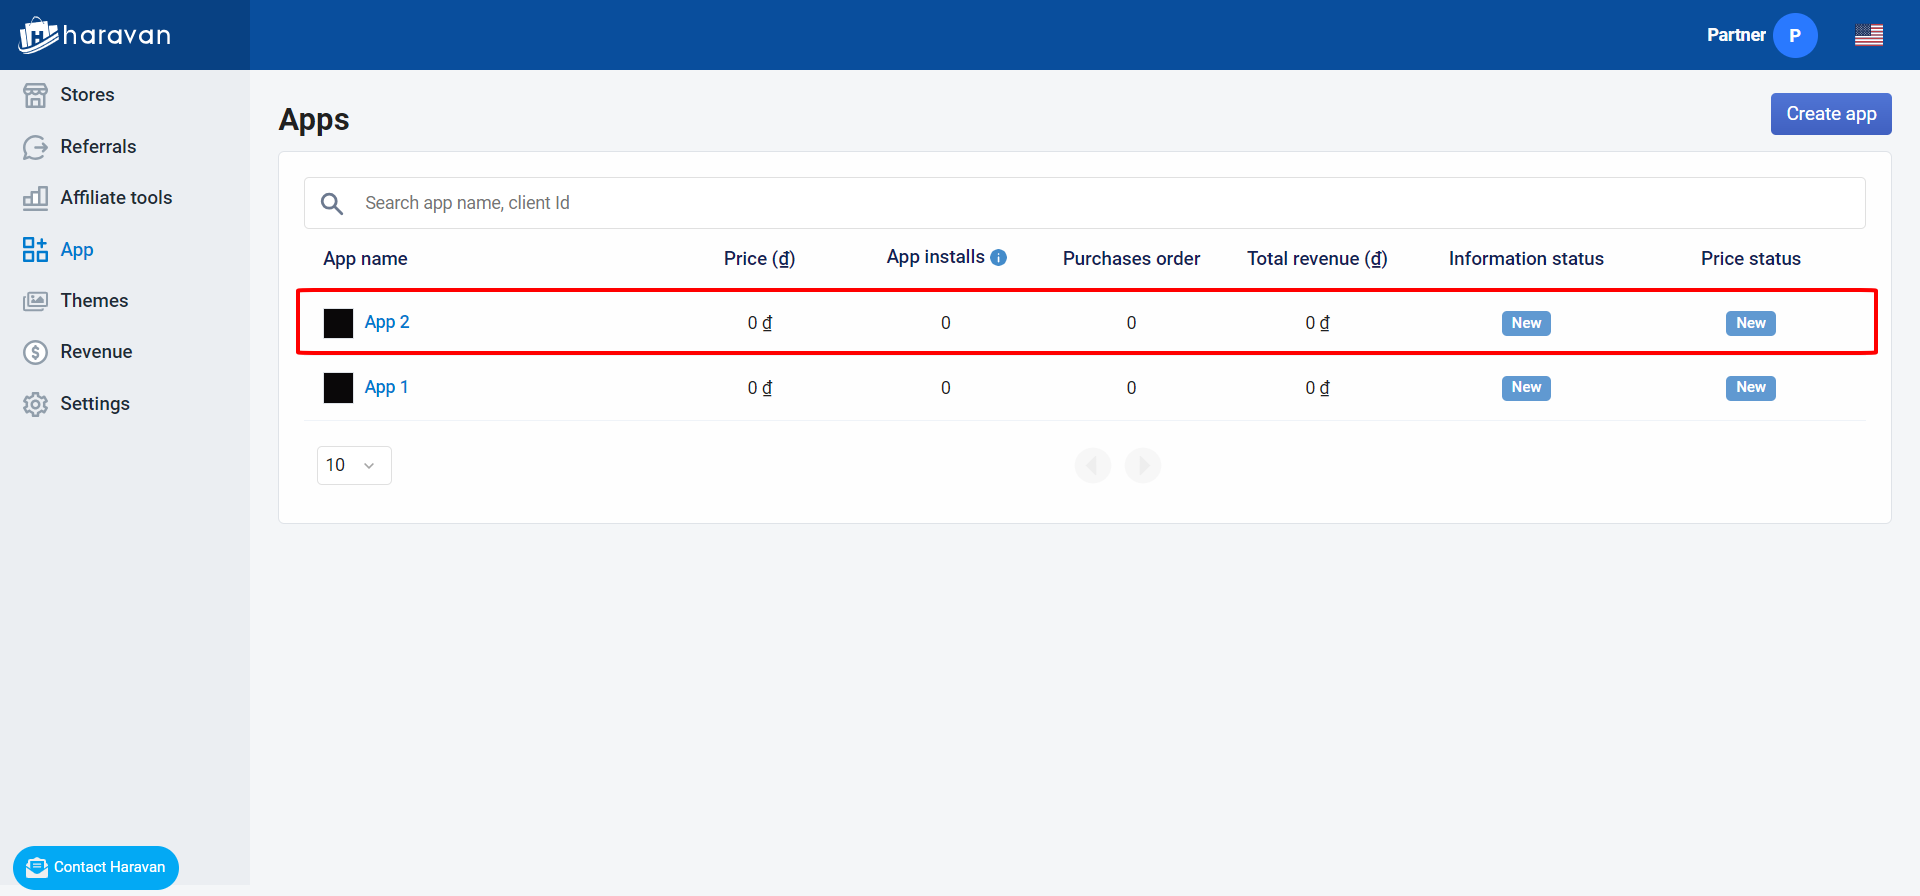
- After sign in/sign up successful, the system will show a list of your applications, click "Create App" button to create a new application.
- Screen for create application.
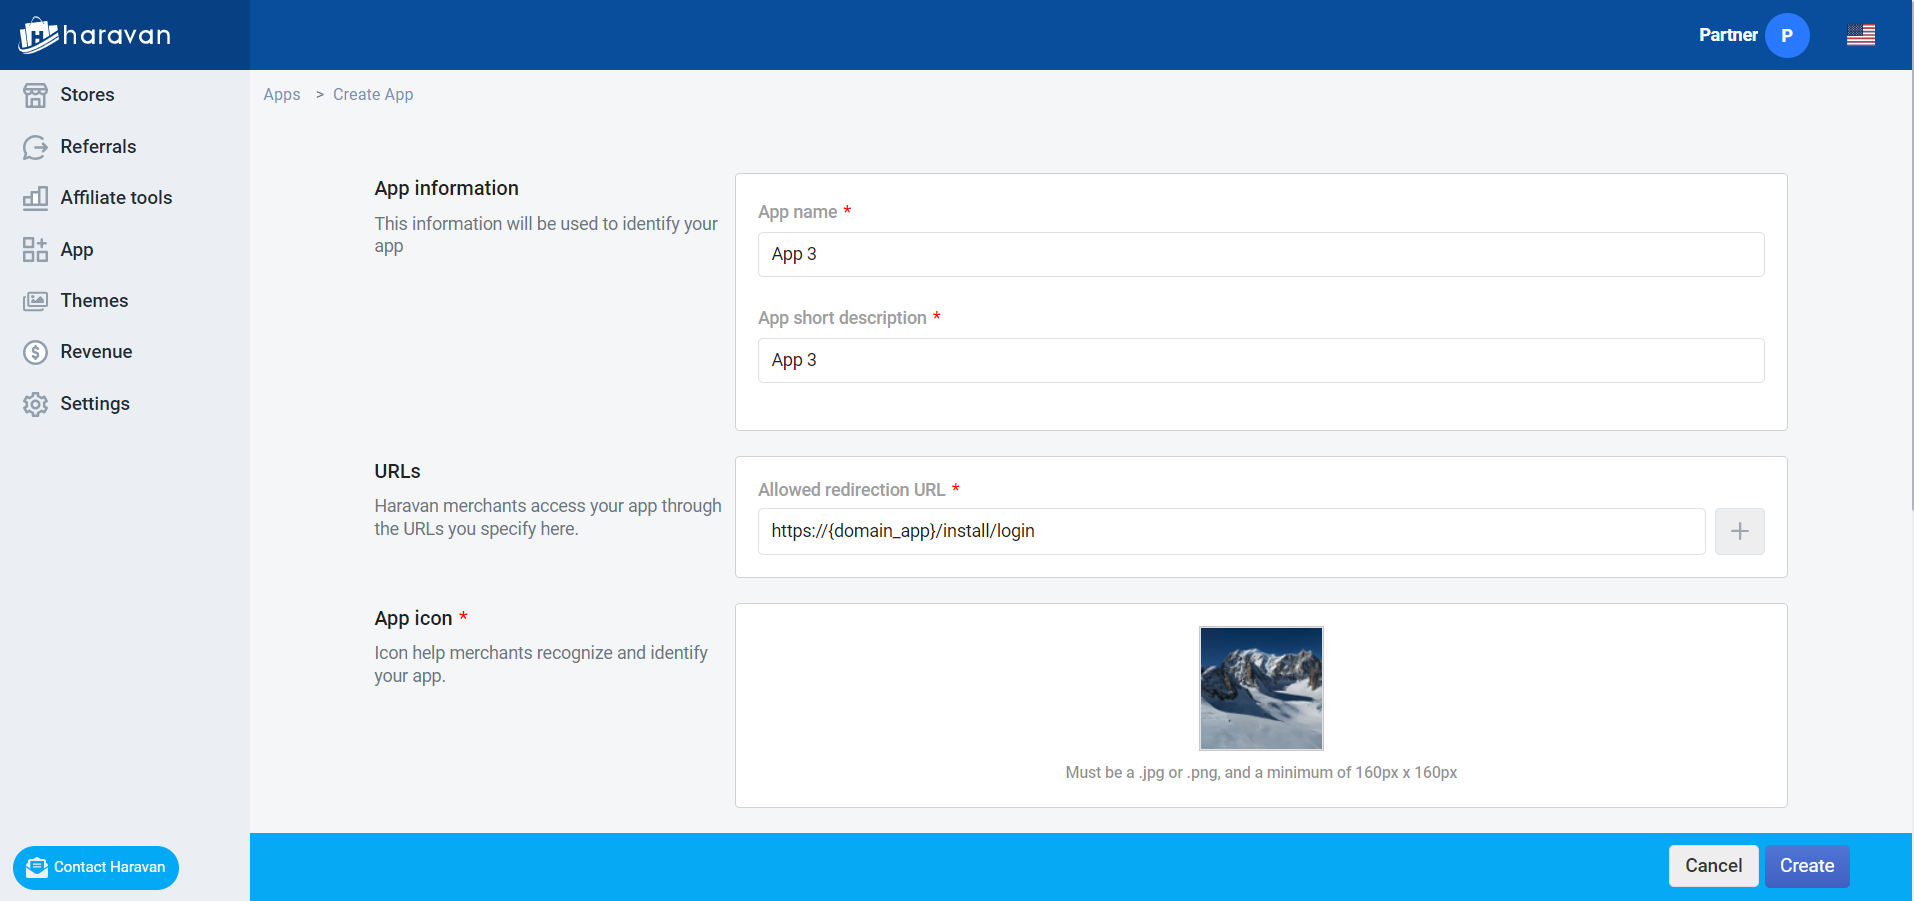
Name: application name.
Description: application description.
Redirect Url: application domain, the system will redirect to this url when starting application.
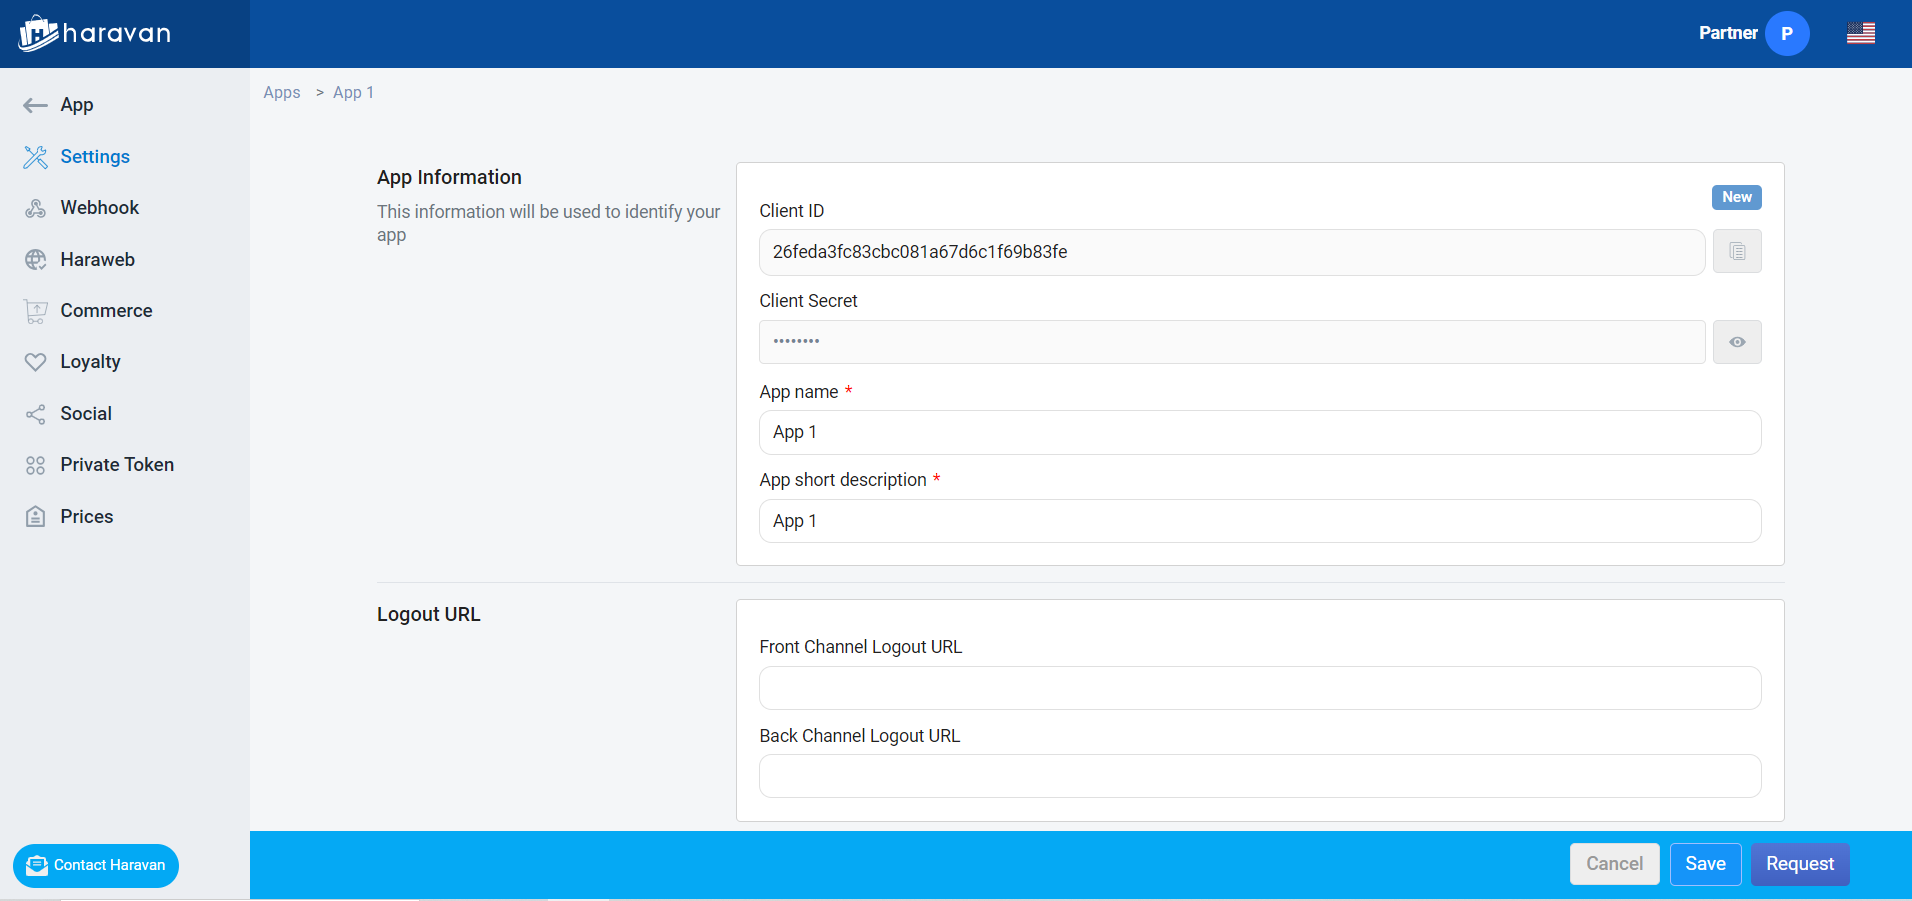
- Create success.
- Some field need to save in config file to use: App Id, App Secret, Redirect Url.
- After created, your application will be appeared on list https://partners.haravan.com/apps
Step 2: Use ngrok to register webhook
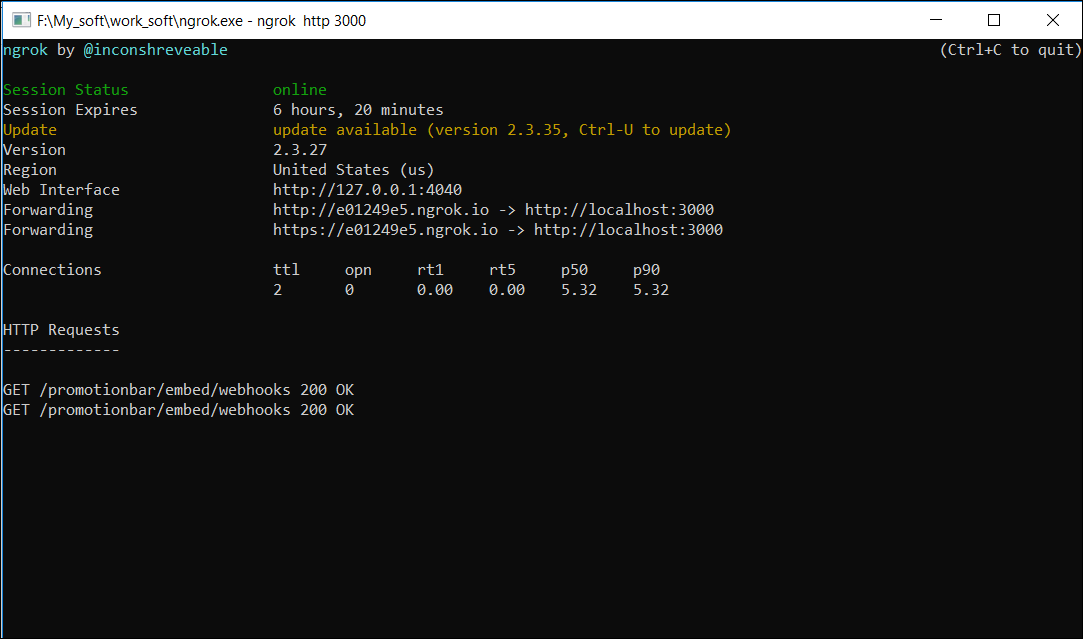
- Ngrok (https://ngrok.com/) creates a secure tunnel on your local machine along with a public URL you can use for browsing your local site.
- If you’re running your local web server on port 3000, in terminal, you’d type in: ngrok http 3000.
- Note:
- A url can be available for 8 hours
- Only use https://
- Use ngrok's web inspection interface to understand the HTTP request and response traffic over your tunnel:
http://localhost:4040
Step 3: Register webhook
- Choose “Webhooks” on the sidebar.
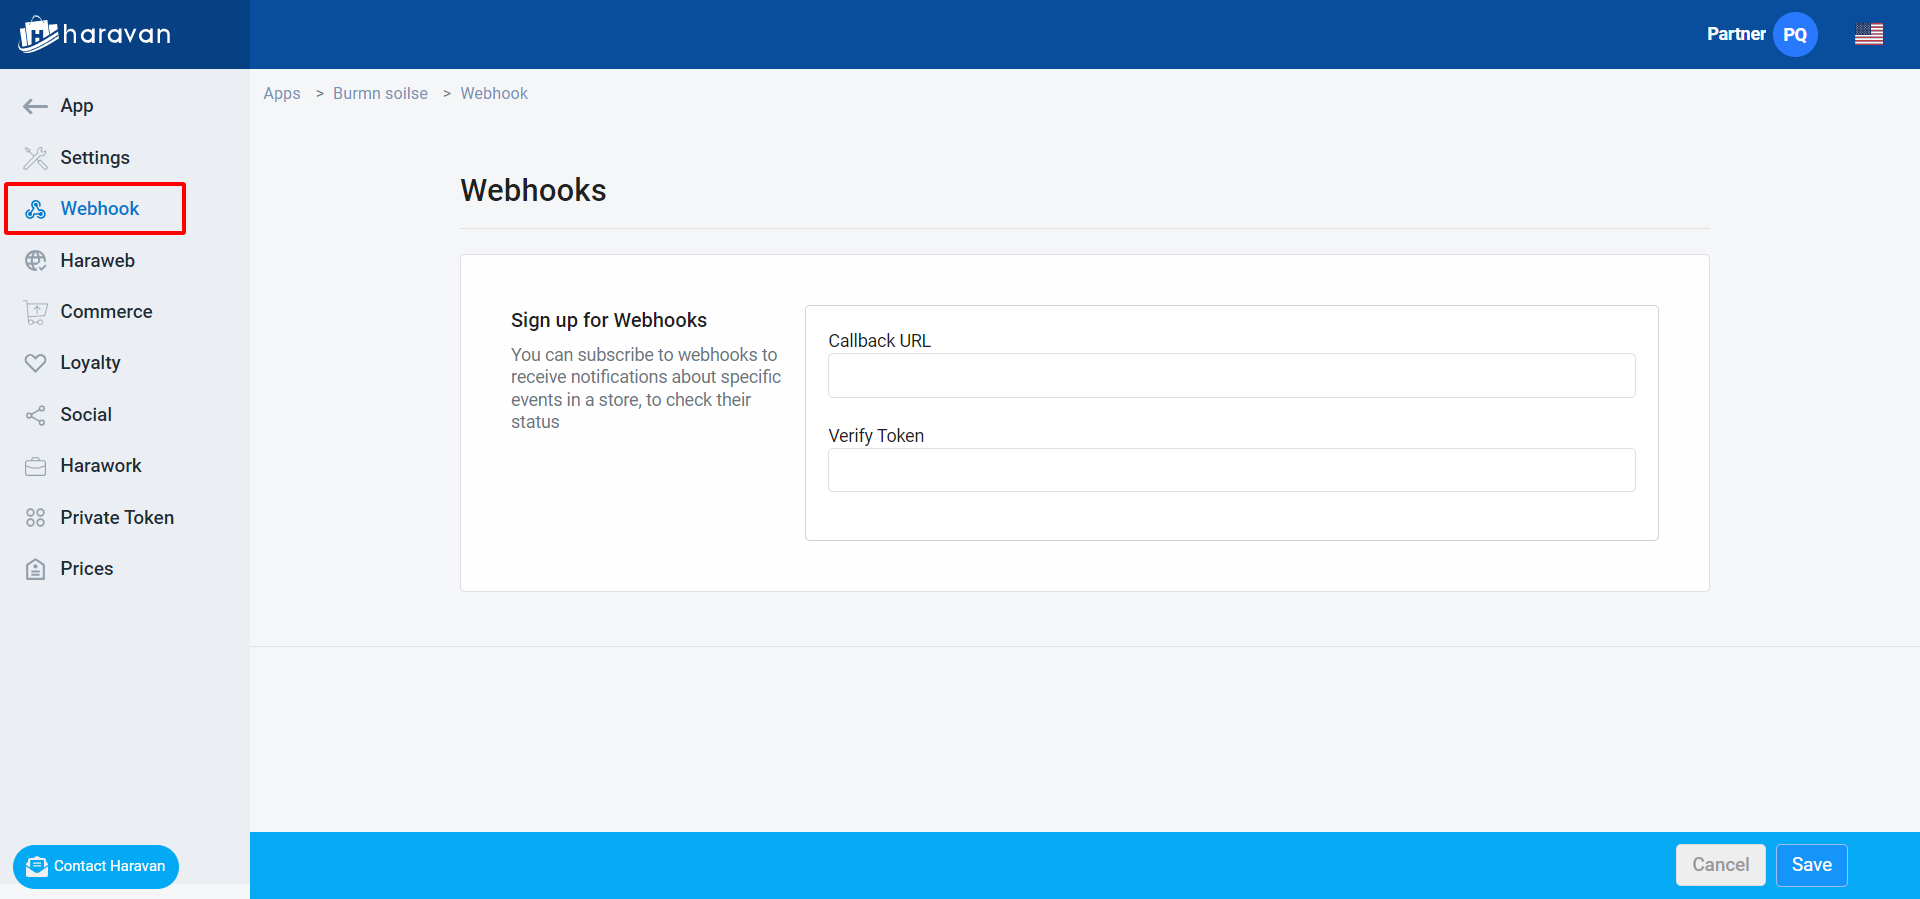
- You need to fill in some information:
- Callback URL: Webhooks will GET a message with query data to this URL when certain things happen. Make sure the url is configured on your application to receive webhooks.
- Verify Token: is random string and has at least 1 character, because it’s used for authenticating with an app, make sure this token matches the string configured on your app.
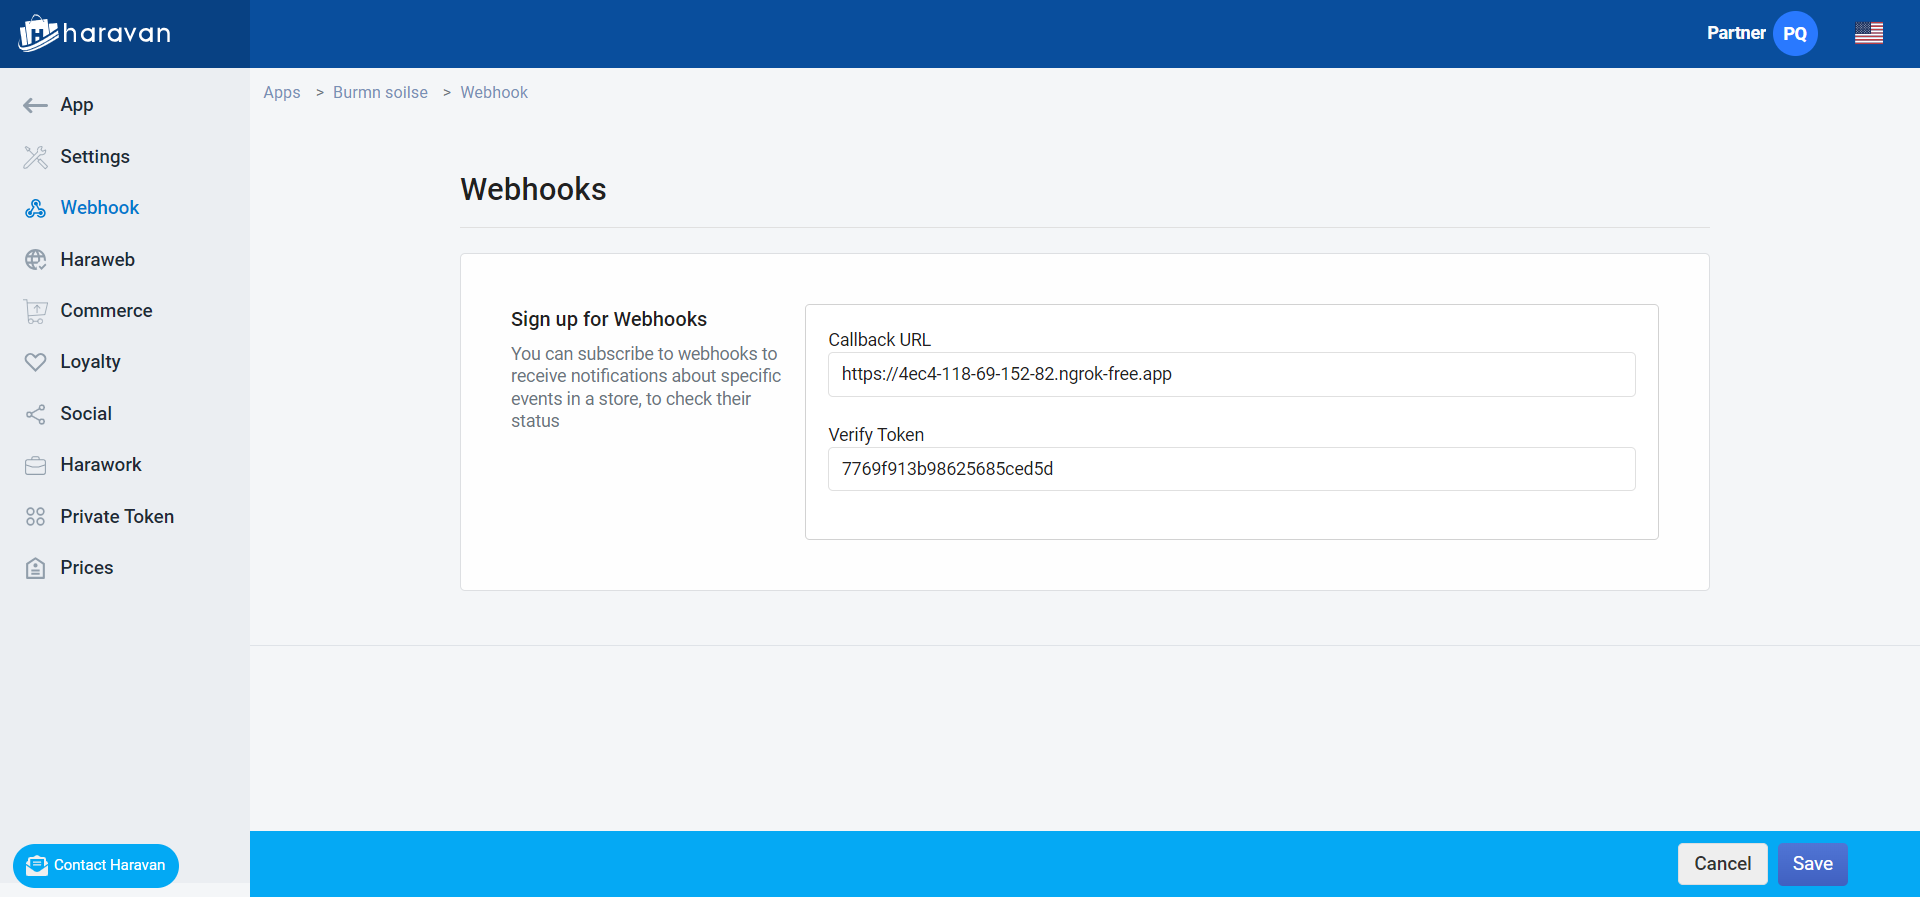
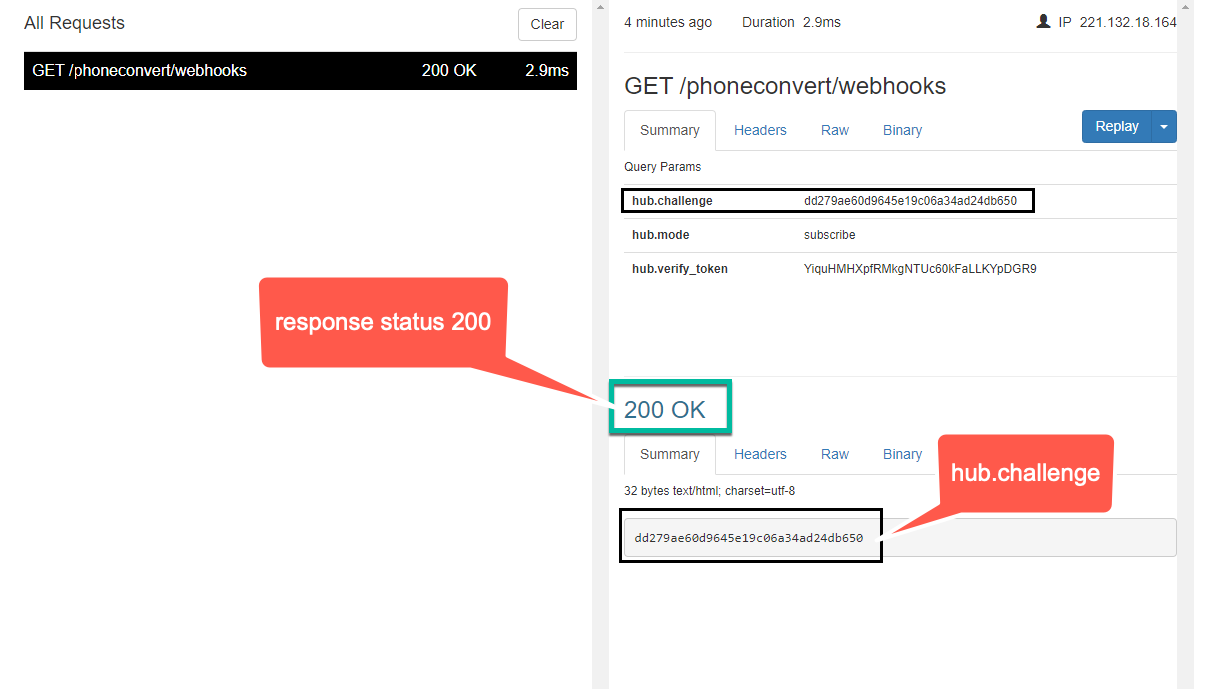
- When you submit, the system will call to your app via the Callback URL:
GET {YOUR_WEBHOOK_CALLBACK_URL}?hub.mode=subscribe&hub.verify_token={Verify_Token}&hub.challenge=bf54608bf2004fc2a528f9e69f774135
- You need to compare hub.verify_token (in object) with verify_token (in your app).
- If not match, response status 401.
- If match, response status 200 and value of hub.challenge
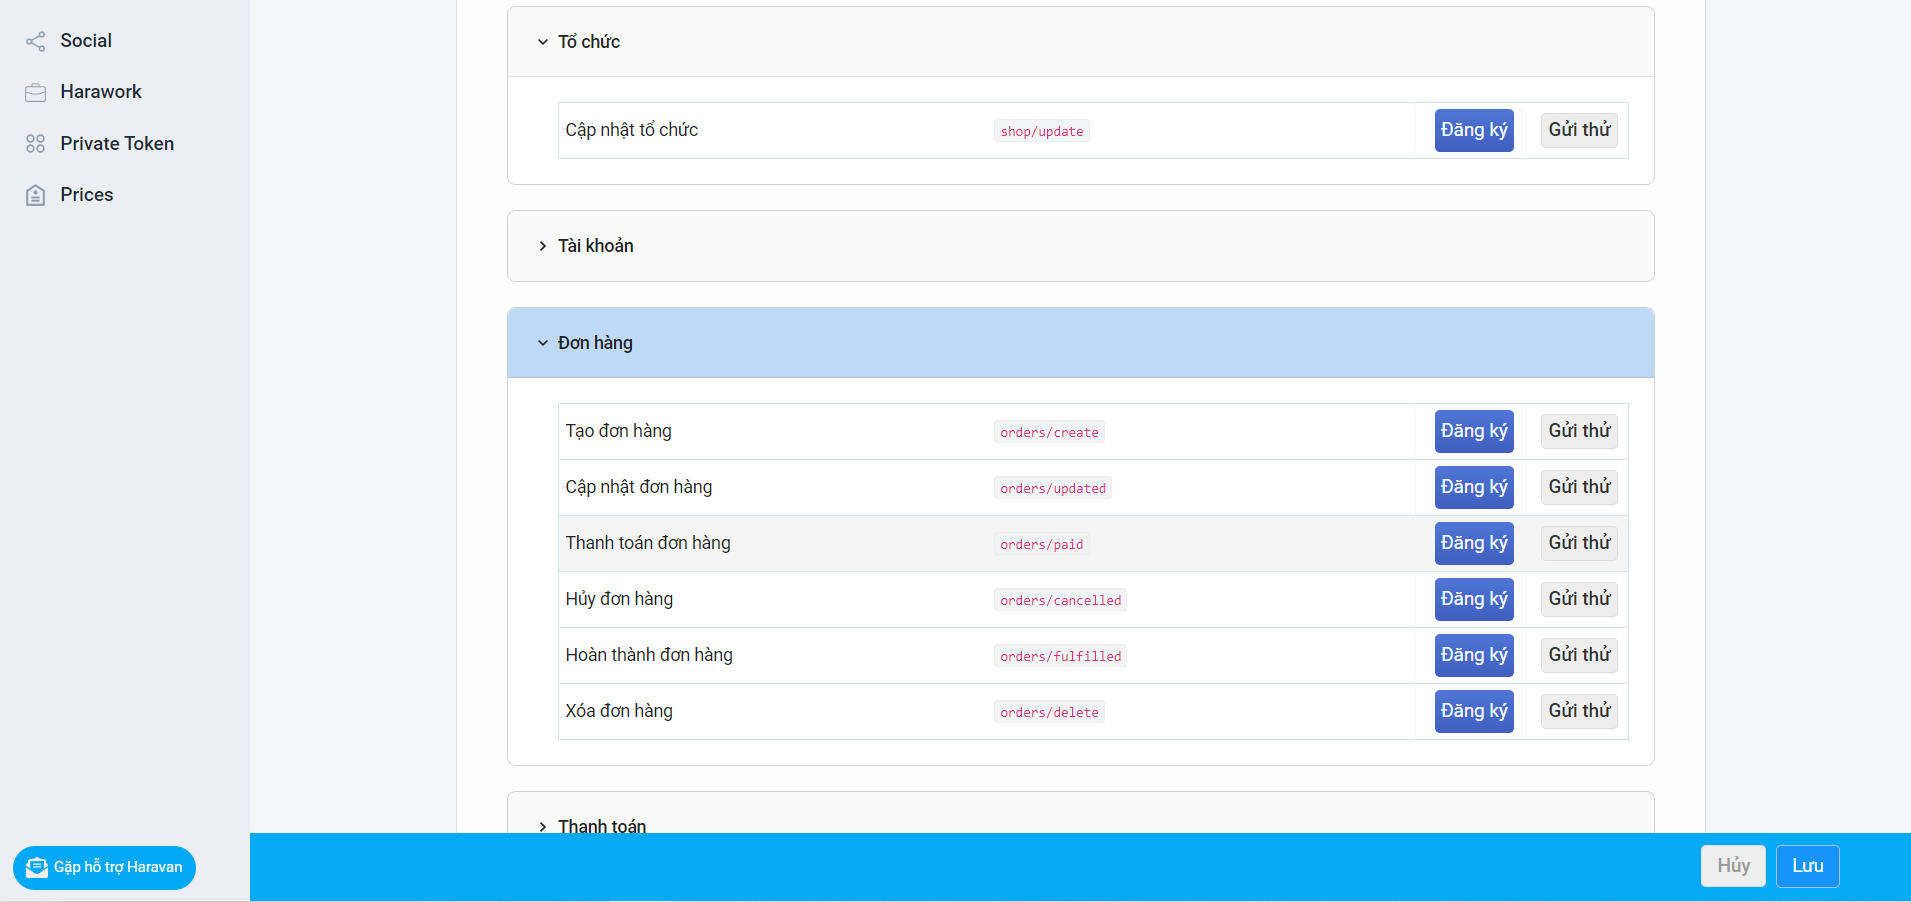
- After registered, you need to reload this page to see the list of events that can subscribe to get notifications.
Step 4: Call api subscribe webhook
Note:
- First, you need Haravan’s access_token to use Haravan’s Api.
- You also need right scope to get Haravan’s access_token.
- The scope to use webhook is: wh_api. (You need more scope for install and use orther api).
- Scope:
- Access_token:
Do this step after you have access_token.
The purpose is to declare that your application can receive webhook notifications.
4.1. Request
| Method | URL |
|---|---|
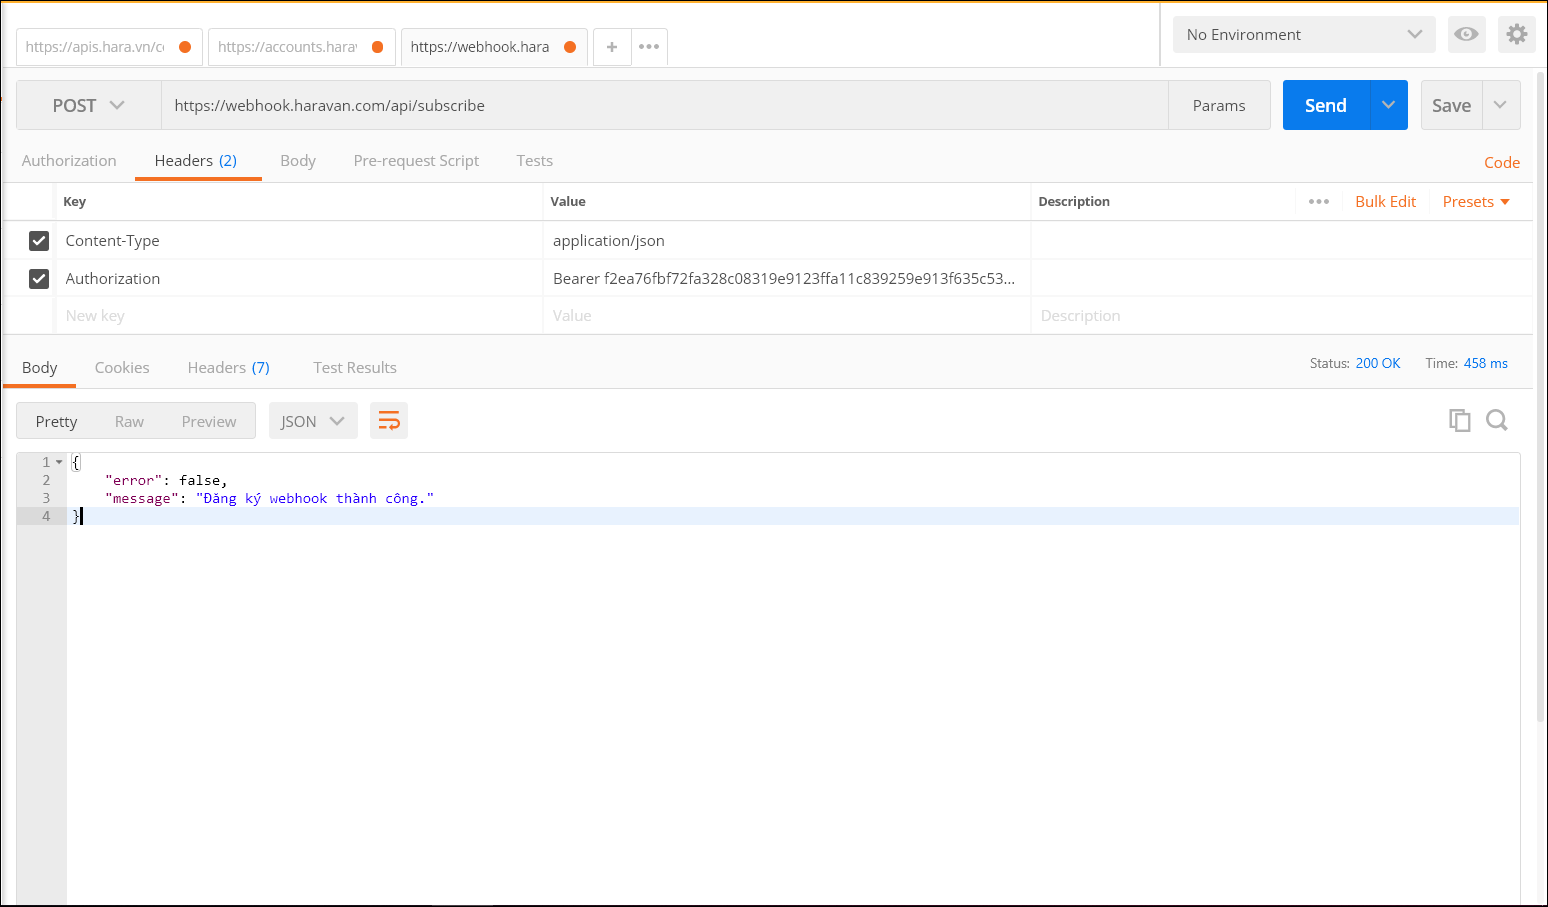
| POST | https://webhook.haravan.com/api/subscribe |
Header:
   Content-Type: application/json
   Authorization: Bearer {Token}

Request body: {}
4.2. Response
| Status | Response |
| 200 | |
| 422 | |
| 401 | Unauthorized |
| 429 | Too many requests |
| 500 | Something went wrong. Please try again later. |
4.3. Use Postman
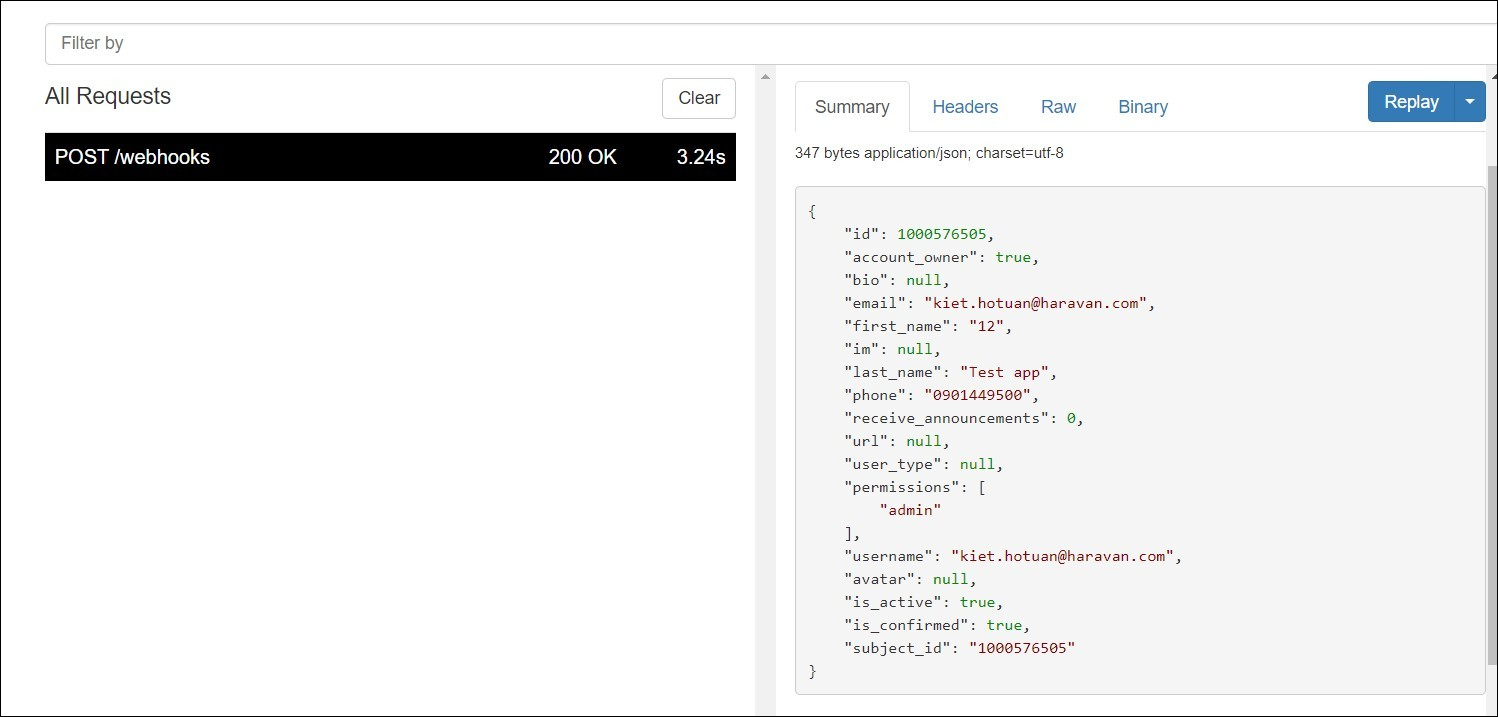
Step 5: Receive notifications from webhook
- After completing the above steps, webhooks will send request to notify your application with method POST.
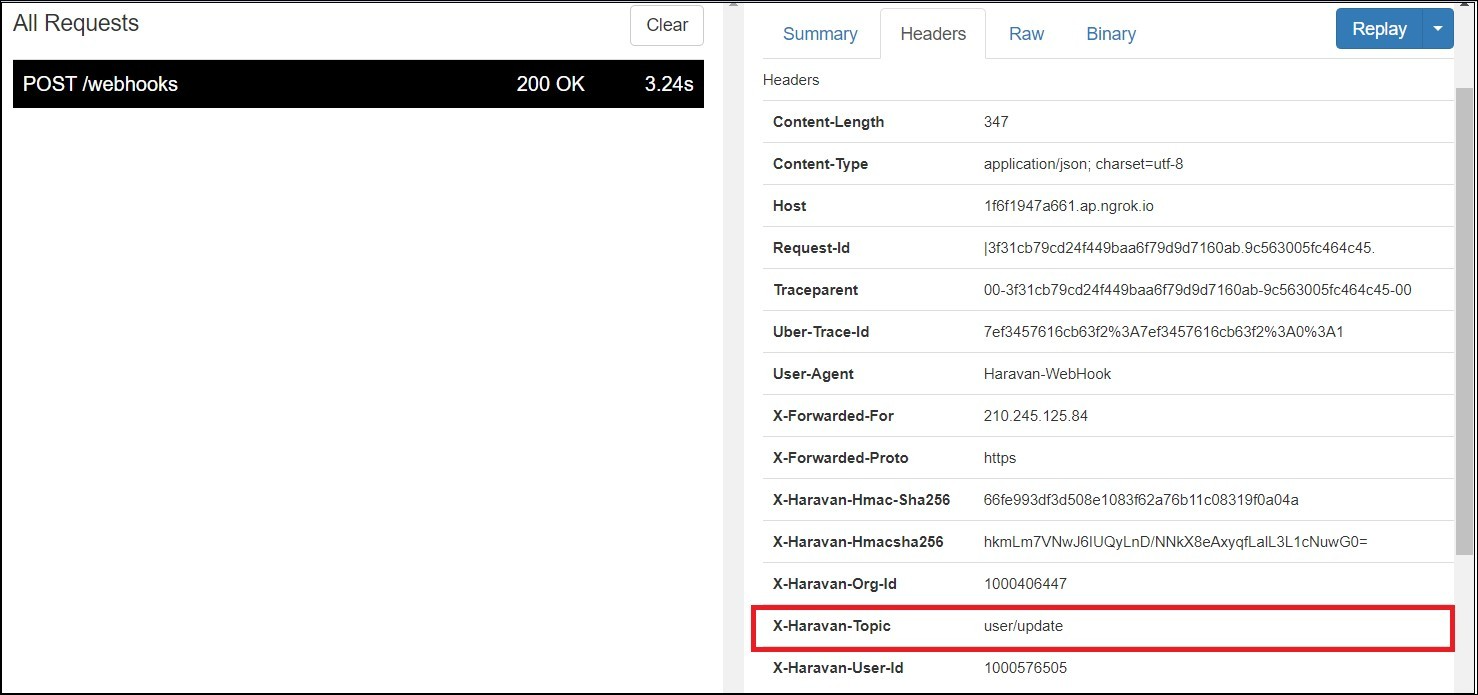
- When sending notify, the webhook will include data in the request, but first you need to pay attention to:
- org_id : to know which shop
- topic: to know which notifications for which events.
- For example, we register an account update event

- When you update your account at https://accounts.haravan.com/, webhook will notify your application with the topic is "user / update" and data of your account via CallBack URL.
Step 6: Authenticate webhook
When you receive data from webhook, you need to verify that it’s data sent from the system.
Collect X-Haravan-Hmacsha256
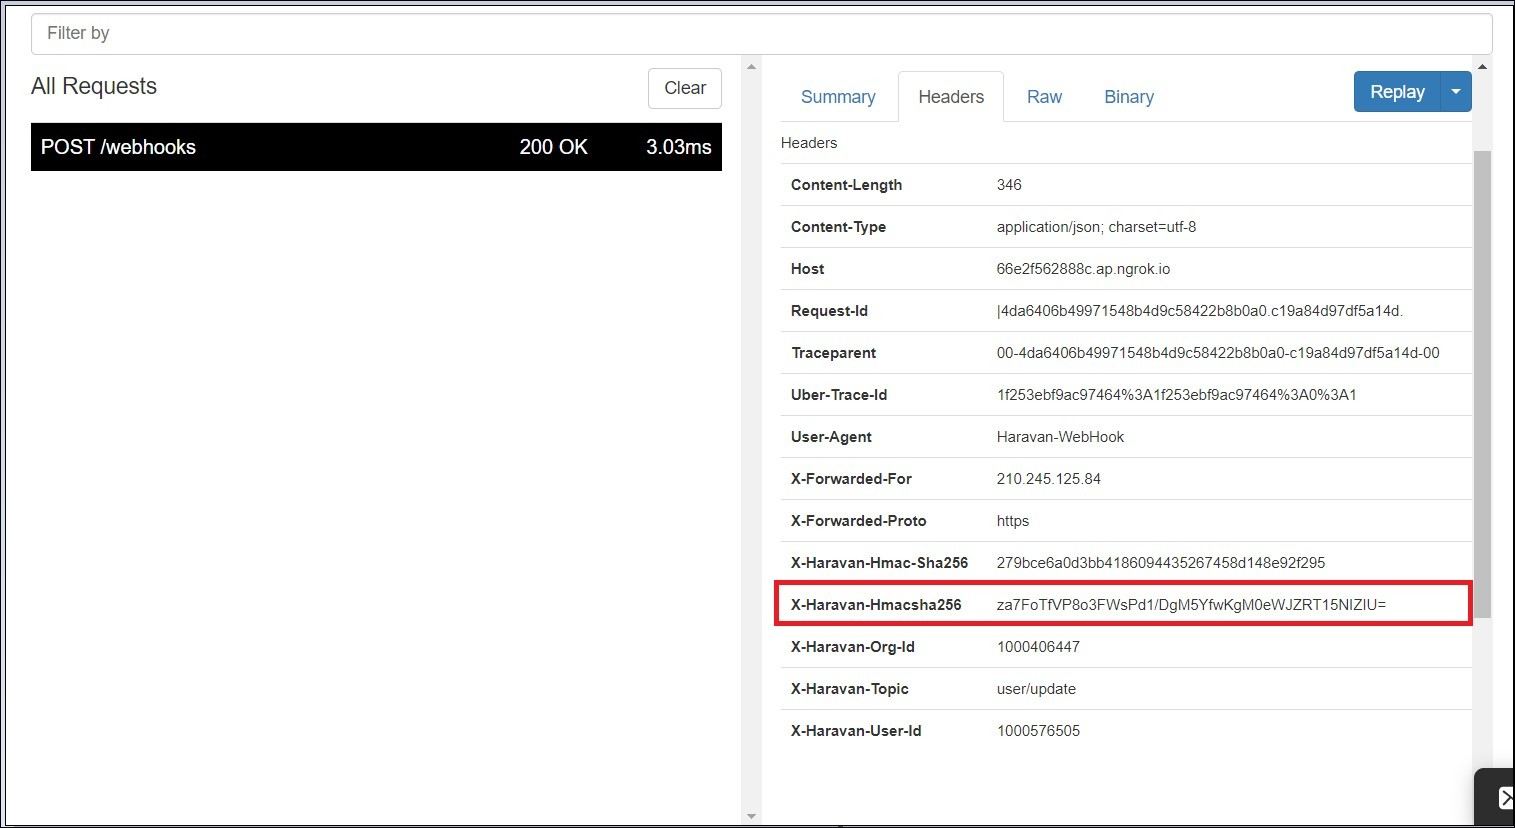
- To authenticate the webook:
- First, we use hash_mac function with "sha256" algorithms to encode a string (data in webhook request + Client Secret) to get the hash code.
- Second, use base64 function to encode this hash.
- Finally, compare it with X-Haravan-Hmacsha256(header of webhook request)..
- If not matches, response status 401.
- If matches, response status 200.
Example in PHP:
<?php
define('CLIENT_SECRET','your_app_client_secret');

function verify_webhook($data,$hmac_header)
{
$calculated_hmac = base64_encode(hash_hmac('sha256', $data, CLIENT_SECRET, true));
return ($hmac_header == $calculated_hmac);
}

//header "X-Haravan-Hmacsha256" in PHP become "HTTP_X_HARAVAN_HMACSHA256"
$hmac_header = $_SERVER['HTTP_X_HARAVAN_HMACSHA256'];
$data = file_get_contents('php://input');
$verified = verify_webhook($data, $hmac_header);
error_log('Webhook verified:'.var_export($verified, true));
//check error.log to see the result
?>
Example in Nodejs: https://github.com/Haravan/haravan-validate
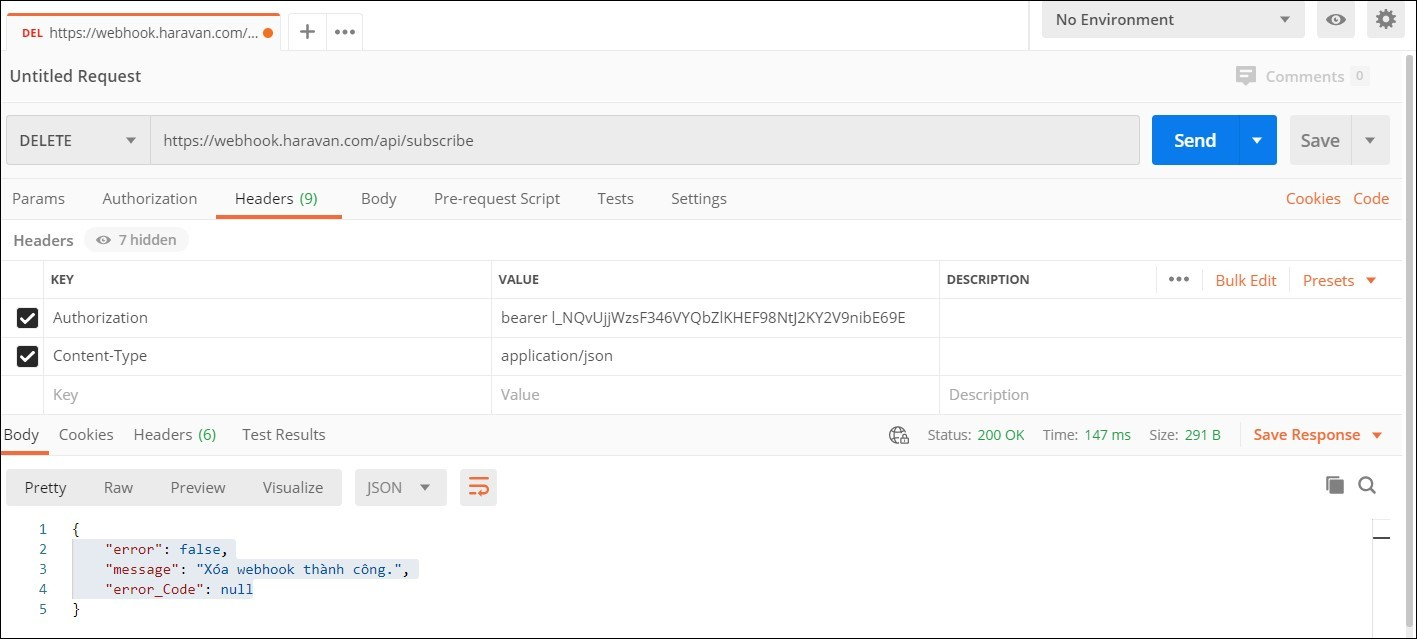
Step 7: Call api unsubscribe webhook
Note
- First, you need Haravan’s access_token to use Haravan’s Api.
- You also need right scope to get Haravan’s access_token.
- The scope to use webhook is: wh_api. (You need more scope for install and use orther api).
- Scope AccessScope
- Access_token:
Do this step after you have access_token.
The purpose is to stop receiving webhooks notifications.
7.1 Request
| Method | URL |
|---|---|
| DELETE | https://webhook.haravan.com/api/subscribe |
Header:
   Content-Type: application/json
   Authorization: Bearer {Token}
7.2. Response
| Status | Response |
| 200 | |
| 422 | |
| 401 | Unauthorized |
| 429 | Too many requests |
| 500 | Something went wrong. Please try again later. |
7.3. Use Postman
Step 8: Call api get subscribed webhook
8.1 Request
| Method | URL |
|---|---|
| GET | https://webhook.haravan.com/api/subscribe |
Header:
   Content-Type: application/json
   Authorization: Bearer {Token}
8.2. Response
| Status | Response |
| 200 | |
| 422 | |
| 401 | Unauthorized |
| 429 | Too many requests |
| 500 | Something went wrong. Please try again later. |
Step 9: Note
- If you do not response status 200 when you received a notification from the webhook, the system will automatically send again.
- Remove ngrok if not used anymore to avoid system spam.
- When uninstall your application, it will lose subscribers, you need to call api subscriber like step 4 again to subscriber the webhook for your application every time you reinstall the app.
Retry frequency:
Your webhook acknowledges that it received data by sending a 200 OK response. Any response outside of the 200 range, including 3XX HTTP redirection codes, indicates that you didn't receive the webhook.
Haravan doesn't follow redirects for webhook notifications and considers them to be an error response.
Haravan has implemented a five-second timeout period and a retry period for webhook subscriptions.
Haravan waits five seconds for a response to each request to a webhook. If there's no response, or an error is returned, then Haravan retries the connection 19 times over the next 48 hours. If there are 19 consecutive failures, then the webhook subscription is automatically deleted. A warning that the subscription will be deleted is sent to the app's emergency developer email address.
To avoid timeouts and errors, consider deferring app processing until after the webhook response has been successfully sent.