Get started with Haravan App
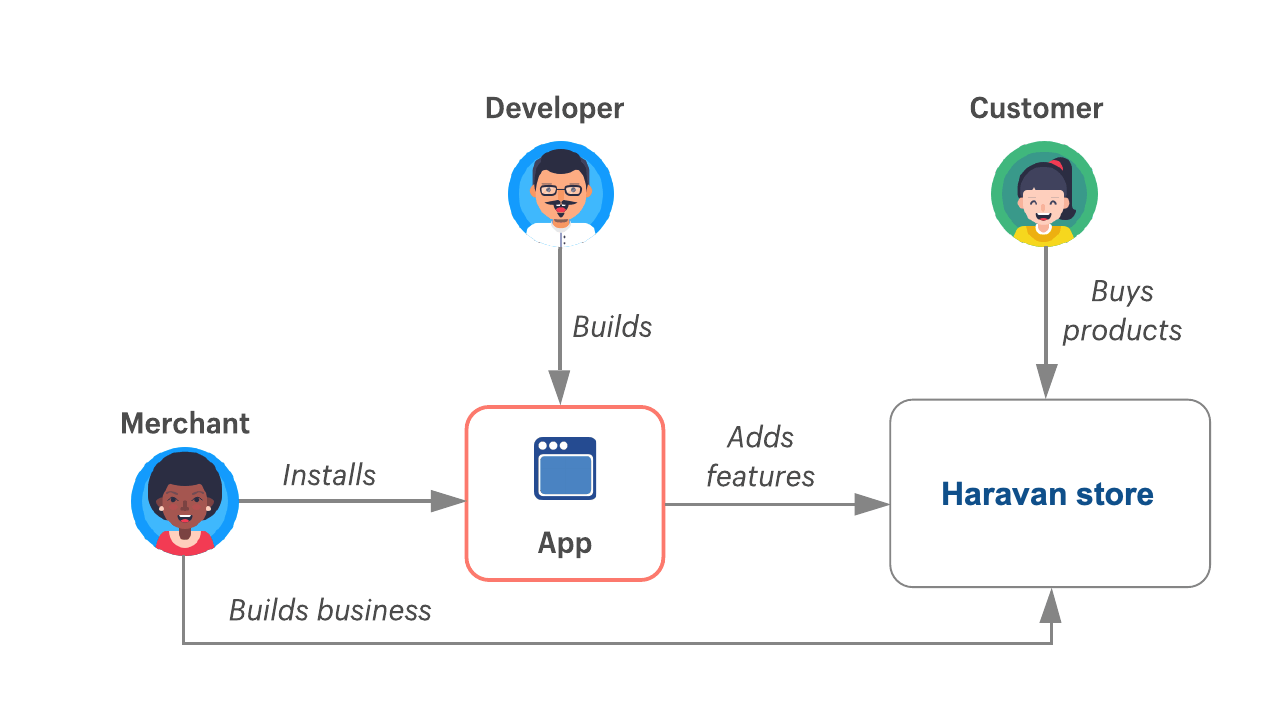
What's a Haravan app?
The app is an extension built by a third-party developer, not by Haravan, App developers can retrieve or sync data from Haravan shop to their App
What you'll learn
After you've finished this tutorial, you'll have accomplished the following:
- Initialized your app on a development store partner
- Generated a new working directory that contains starter code
- Request the App's scope of access and data usage with Haravan shop
- Installed your app on Haravan Shop
Requirements
Register a partner account
- Go to Haravan partners, fill Register form
- In the Partners information section, enter your information. Click Done.
Create a development store
- Go to Haravan Shop Register, fill Register form.
- To create a product go to your Shop Admin Dashboard >> Products, Click Add product
Step 1: Create an app
- Log in to your Partner Dashboard.
- Click Apps.
- Click Add an app to open Developers Dashboard.
- Click Create App.
- Enter the App
Haravan express, add an Allowed Redirect URL ofhttp://localhost:3000/callback. - Click Create.
- View your
Client IDandClient Secret (need re-enter your password)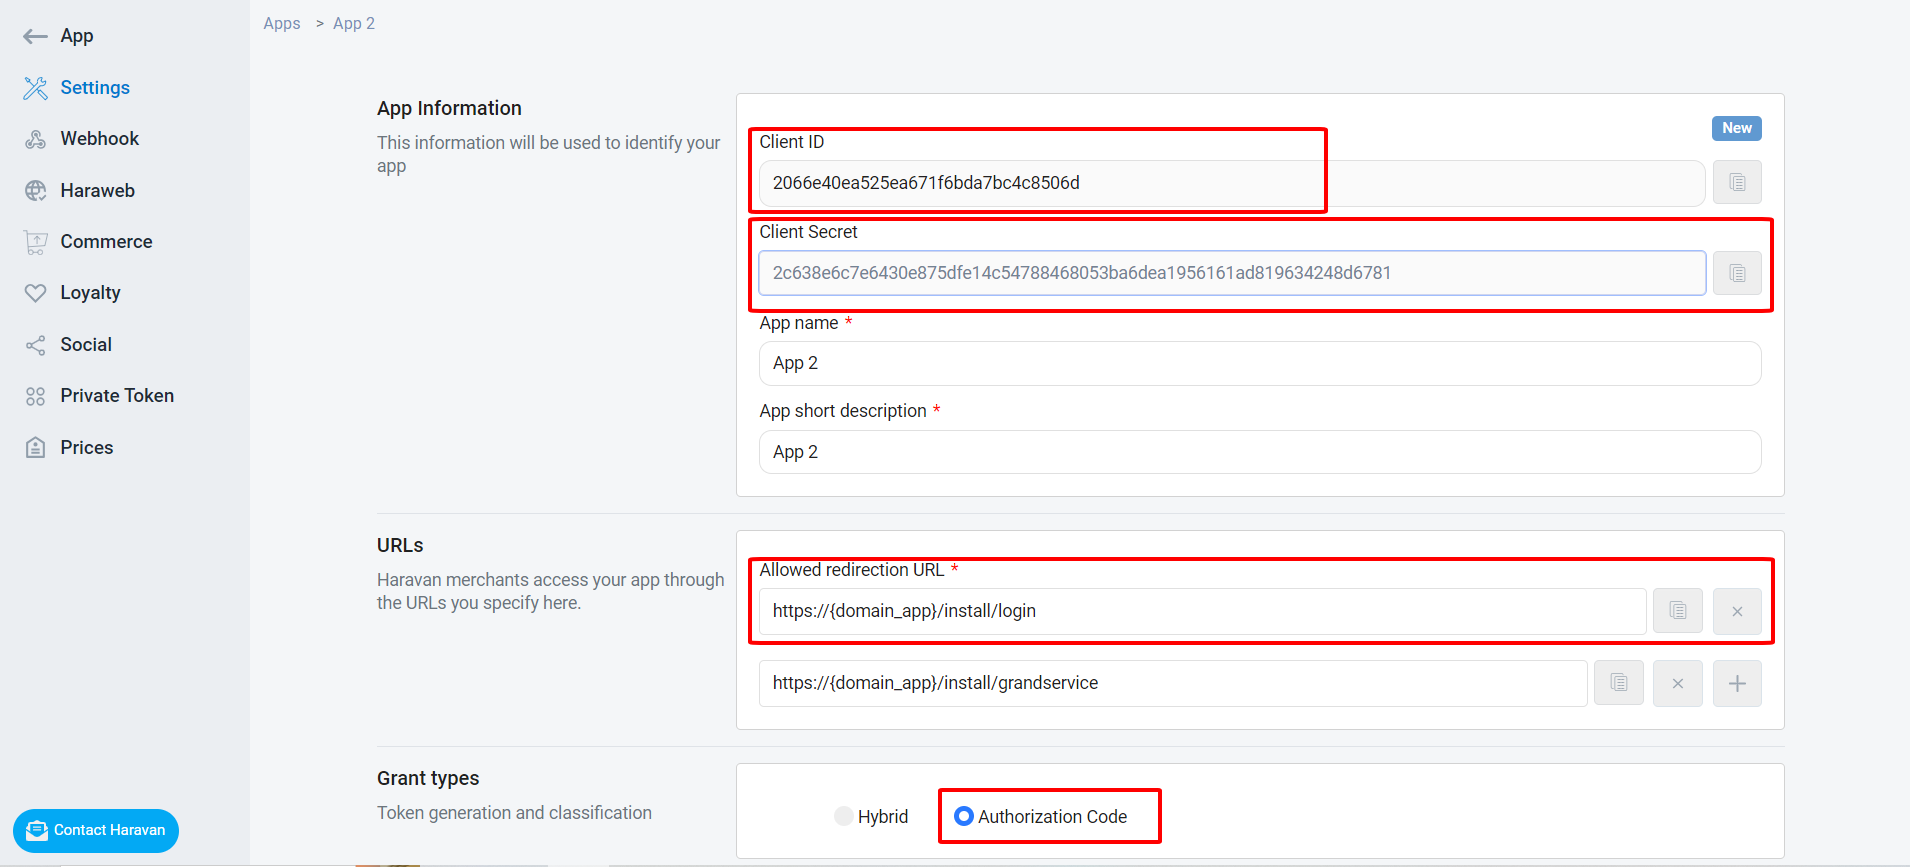
- you need to select data available
access scopes
Step 2: Confirm installation
When the merchant clicks the install button in the prompt, they’re redirected to your app's server. The authorization_code is passed in the confirmation redirect:
Build installation URL:
https://accounts.haravan.com/connect/authorize?response_mode=query&response_type=code&scope=openid org profile userinfo com.write_products com.read_products grant_service&client_id=0c8a9f50f9badbde912dc489b369a79d&redirect_uri=http://localhost:3000/callback
Login permissions prompt. Haravan shows the following prompt to receive authorization from the user.
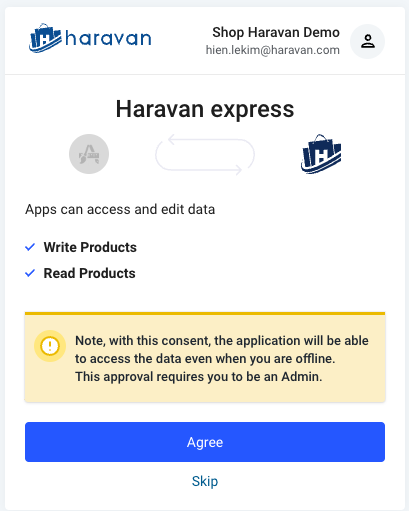
Results after selecting confirm to install the App

Step 3:Request tokens
Now that you have an Authorization Code, you must exchange it for tokens. Using the extracted Authorization Code (code) from the previous step, you will need to POST to the token URL /connect/token.
The Access Token you receive in this step is the one you should use to call your API.
curl -X POST https://accounts.haravan.com/connect/token \
  -H 'Content-Type: application/x-www-form-urlencoded' \
  -d 'grant_type=authorization_code' \
  -d 'client_id=0c8a_test_b369a79d' \
  -d 'client_secret=abe6_test_dc8e5c19ca0449148c3c9e3' \
  -d 'code=1028_test_53BEB13F647CAF676' \
  -d 'redirect_uri=http://localhost:3000/callback'
Response connect token
If all goes well, you'll receive an HTTP 200 response with a payload containing access_token, id_token, token_type, and (optional) refresh_token values:
{
  "id_token": "eyJh_test_DIBHk2HD0Q-mgyAc5c3xzmxsR0usro3bbm94-3TZKu3A",
  "access_token": "CCF8_test_04A7EB5337C280E34",
  "expires_in": 473040000,
  "token_type": "Bearer",
  "scope": "openid org profile userinfo com.write_products com.read_products grant_service"
}
Step 4:Call API
To call API from a regular web application (or similar cases in which the Client Secret can be safely stored), the application must pass the retrieved Access Token as a Bearer token in the Authorization header of your HTTP request.
curl https://apis.haravan.com/com/products.json \
  -H 'Content-Type: application/json' \
  -H 'Authorization: Bearer {Token}'