Multipass
Let's say you are the owner of a successful website forum. All of your users must log in to the forum to contribute. Members of your forum can then purchase a forum t-shirt through your haravan store. Unfortunately, your users have to log in to the forum first and then log in to your haravan store before they can purchase a t-shirt.
Multipass login is for store owners who have a separate website and a haravan store. It redirects users from the website to the haravan store and seamlessly logs them in with the same email address they used to sign up for the original website. If no account with that email address exists yet, one is created. There is no need to synchronize any customer databases.
1. Enable Multipass login through your shop admin
Log in to your shop admin and go to the Settings > Checkout page. Scroll down to the Customer Accounts section and ensure that you have either Accounts are optional selected or Accounts are required.

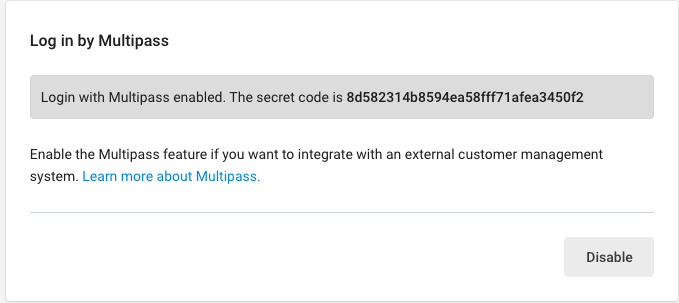
Select Enable Multipass. Once enabled, a secret will be shared with you. You will need the secret in order to generate tokens to log your customers into your haravan store. Make sure you keep your secret private.
2. Encode your customer information using JSON
The customer information is represented as a hash which must contain at least the email address of the customer and a current timestamp (in ISO8601 encoding). You can also include the customer's first name, last name or several shipping addresses. Optionally, you can include an IP address of the customer's current browser session, that makes the token valid only for requests originating from this IP address.
A minimal example, containing all required fields for email identity, might look like this:
{
  email: "[email protected]",
  created_at: "2013-04-11T15:16:23-04:00",
}
A minimal example, containing all required fields for phone identity, might look like this:
{
  phone: "0901866099",
  created_at: "2013-04-11T15:16:23-04:00",
}
An example containing some optional fields might look like this:
{
  email: "[email protected]",
  created_at: "2013-04-11T15:16:23-04:00",

  first_name: "Bob",
  last_name: "Bobsen",
  tag_string: "canadian, premium",

  identifier: "bob123",
  remote_ip: "107.20.160.121",
  return_to: "http://yourstore.com/some_specific_site",

  addresses: [{
    address1: "123 Oak St",
    city: "Ottawa",
    country: "Canada",
    first_name: "Bob",
    last_name: "Bobsen",
    phone: "555-1212",
    province: "Ontario",
    zip: "123 ABC",
    province_code: "ON",
    country_code: "CA",
    default: true
  }]
}
You can attribute tags to your customer by setting "tag_string" to a list of comma seperated one-word values. These tags will override any tags that you may have already attributed to this customer.
At haravan, we use email addresses as unique identifiers for customers of a shop. If your site uses other identifiers (such as usernames), or if it is possible that two different users of your site registered with the same email address, you must set the unique identifier in the "identifier" field to avoid security problems. If the email address is always unique, you don't need to set the "identifier" field.
If you want your users to see a specific page of your haravan store, you can use the "return_to" field for that.
3. Encrypt the JSON data using AES
To generate a valid multipass login token, you need the secret given to you in your haravan admin. The secret is used to derive two cryptographic keys — one for encryption and one for signing. This key derivation is done through the use of the SHA-256 hash function (the first 128 bit are used as encryption key and the last 128 bit are used as signature key).
The encryption provides confidentiality. It makes sure that no one can read the customer data. As encryption cipher, we use the AES algorithm(128 bit key length, CBC mode of operation, random initialization vector).
4. Sign the encrypted data using HMAC
The signature (also called message authentication code) provides authenticity. It makes sure that the multipass token is authentic and hasn't been tampered with. We use the HMAC algorithm with a SHA-256 hash function and we sign the encrypted JSON data from step 2 (not the plaintext JSON data from step 1).
5. Base64 encode the binary data
The multipass login token now consists of the 128 bit initialization vector, a variable length ciphertext, and a 256 bit signature (in this order). This data is encoded using base64 (URL-safe variant, RFC 4648).
6. Redirect your customer to your haravan store
Once you have the token, you should trigger a HTTP GET request to your haravan store.
GET /account/login/multipass/insert_token_here
When the request is successful (e.g. the token is valid and not expired), the customer will be logged in to your haravan store.
The multipass token is only valid within a very short timeframe and each token can only be used once. For those reasons, you should not generate tokens in advance for rendering them into your HTML sites. You should create a redirect URL which generates tokens on-the-fly when needed and then automatically redirects the browser.
Example implementation
The following shows a basic example implementation of the token generation in the Ruby language.
require "openssl"
require "base64"
require "time"
require "json"

class haravanMultipass
  def initialize(multipass_secret)
    ### Use the Multipass secret to derive two cryptographic keys,
    ### one for encryption, one for signing
    key_material = OpenSSL::Digest.new("sha256").digest(multipass_secret)
    @encryption_key = key_material[ 0,16]
    @signature_key  = key_material[16,16]
  end

  def generate_token(customer_data_hash)
    ### Store the current time in ISO8601 format.
    ### The token will only be valid for a small timeframe around this timestamp.
    customer_data_hash["created_at"] = Time.now.iso8601

    ### Serialize the customer data to JSON and encrypt it
    ciphertext = encrypt(customer_data_hash.to_json)

    ### Create a signature (message authentication code) of the ciphertext
    ### and encode everything using URL-safe Base64 (RFC 4648)
    Base64.urlsafe_encode64(ciphertext + sign(ciphertext))
  end

  private

  def encrypt(plaintext)
    cipher = OpenSSL::Cipher.new("aes-128-cbc")
    cipher.encrypt
    cipher.key = @encryption_key

    ### Use a random IV
    cipher.iv = iv = cipher.random_iv

    ### Use IV as first block of ciphertext
    iv + cipher.update(plaintext) + cipher.final
  end

  def sign(data)
    OpenSSL::HMAC.digest("sha256", @signature_key, data)
  end
end

customer_data = {
  email: "[email protected]",
  remote_ip: "107.20.160.121"
}

token = haravanMultipass.new("multipass secret from shop admin").generate_token(customer_data)

...
The following shows a basic example implementation of the token generation in PHP.
<?php
date_default_timezone_set("UTC");

class haravanMultipass {
    private $encryption_key;
    private $signature_key;

    public function __construct($multipass_secret) {
        // Use the Multipass secret to derive two cryptographic keys,
        // one for encryption, one for signing
        $key_material = hash("sha256", $multipass_secret, true);
        $this->encryption_key = substr($key_material, 0, 16);
        $this->signature_key = substr($key_material, 16, 16);
    }

    public function generate_token($customer_data_hash) {
        // Store the current time in ISO8601 format.
        // The token will only be valid for a small timeframe around this timestamp.
        $customer_data_hash["created_at"] = date("c");

        // Serialize the customer data to JSON and encrypt it
        $ciphertext = $this->encrypt(json_encode($customer_data_hash));

        // Create a signature (message authentication code) of the ciphertext
        // and encode everything using URL-safe Base64 (RFC 4648)
        return strtr(base64_encode($ciphertext . $this->sign($ciphertext)), '+/', '-_');
    }

    private function encrypt($plaintext) {
        // Use a random IV
        $iv = openssl_random_pseudo_bytes(16);

        // Use IV as first block of ciphertext
        return $iv . openssl_encrypt($plaintext, "AES-128-CBC", $this->encryption_key, OPENSSL_RAW_DATA, $iv);
    }

    private function sign($data) {
        return hash_hmac("sha256", $data, $this->signature_key, true);
    }
}

$customer_data = array(
    "email" => "[email protected]",
    "remote_ip" => "127.0.0.1"
);

$multipass = new haravanMultipass("multipass secret from shop admin");
$token = $multipass->generate_token($customer_data);
?>
To view a node.js module for haravan Multipass, called Multipassify, click here.
Security considerations
We highly encourage you to always set the "remote_ip" field in the customer data hash, so that only the intended browser can use the token. We also encourage you to send tokens to the browser using secure HTTPS connections.
You should make sure that registering new accounts at your main website requires validation of the email address which is used. Otherwise, someone could sign up to your main site using somebody elses email address, thus getting access to his customer account in your haravan store.
FAQ
I have a huge customer database. How do I synchronize this with haravan so that I can use multipass login?
You don't need to synchronize anything. As soon as you redirect a customer using multipass, we will automatically create a customer account for them in your haravan store (if one doesn't exist yet).
Some of my customers have already placed orders on haravan. How do I update those customers so they can login through multipass?
You can use the
Update Customer APIto set the multipass_identifier for the customer. You will need to use the identifier with all your multipass requests for those customer accountsMy secret was leaked. What do I do now?
If your secret ever leaks, it can be revoked in your shop admin and a new one can be generated. This will make all of the old URLs invalid. You should do this as quickly as possible since everybody who knows the secret can potentially access every customer account!